
Depotting 101
10:21:00 PM

Depotting your eyeshadows is a great way to downsize and organize your makeup collection.
Some girls don't really know how easy this is, but today I am going to show you my method of depotting some eyeshadows, and I am sure you are going to love it :)
There are 2 basic methods to do this, you can basically do it with or without heat. I prefer to do it with a little bit of heat because it is simple, fast and easy.
So, if you wanna learn how to do this, scroll down and take a look.
Sacar las sombras de los contenedores es una manera muy eficiente de organizar y hacer más pequeña y práctica tu colección de sombras.
Algunas chicas no tienen ni idea de lo sencillo que es hacer esto, pero que no cunda el pánico, hoy les voy a compartir mi método para hacerlo y estoy segura que les va a gustar.
Existen básicamente 2 formas de hacer esto, con o sin calor. Yo prefiero hacerlo utilizando la ayuda del calor de una vela puesto que es más sencillo y rápido.
Si quieren conocer como lo hago, presten atención.


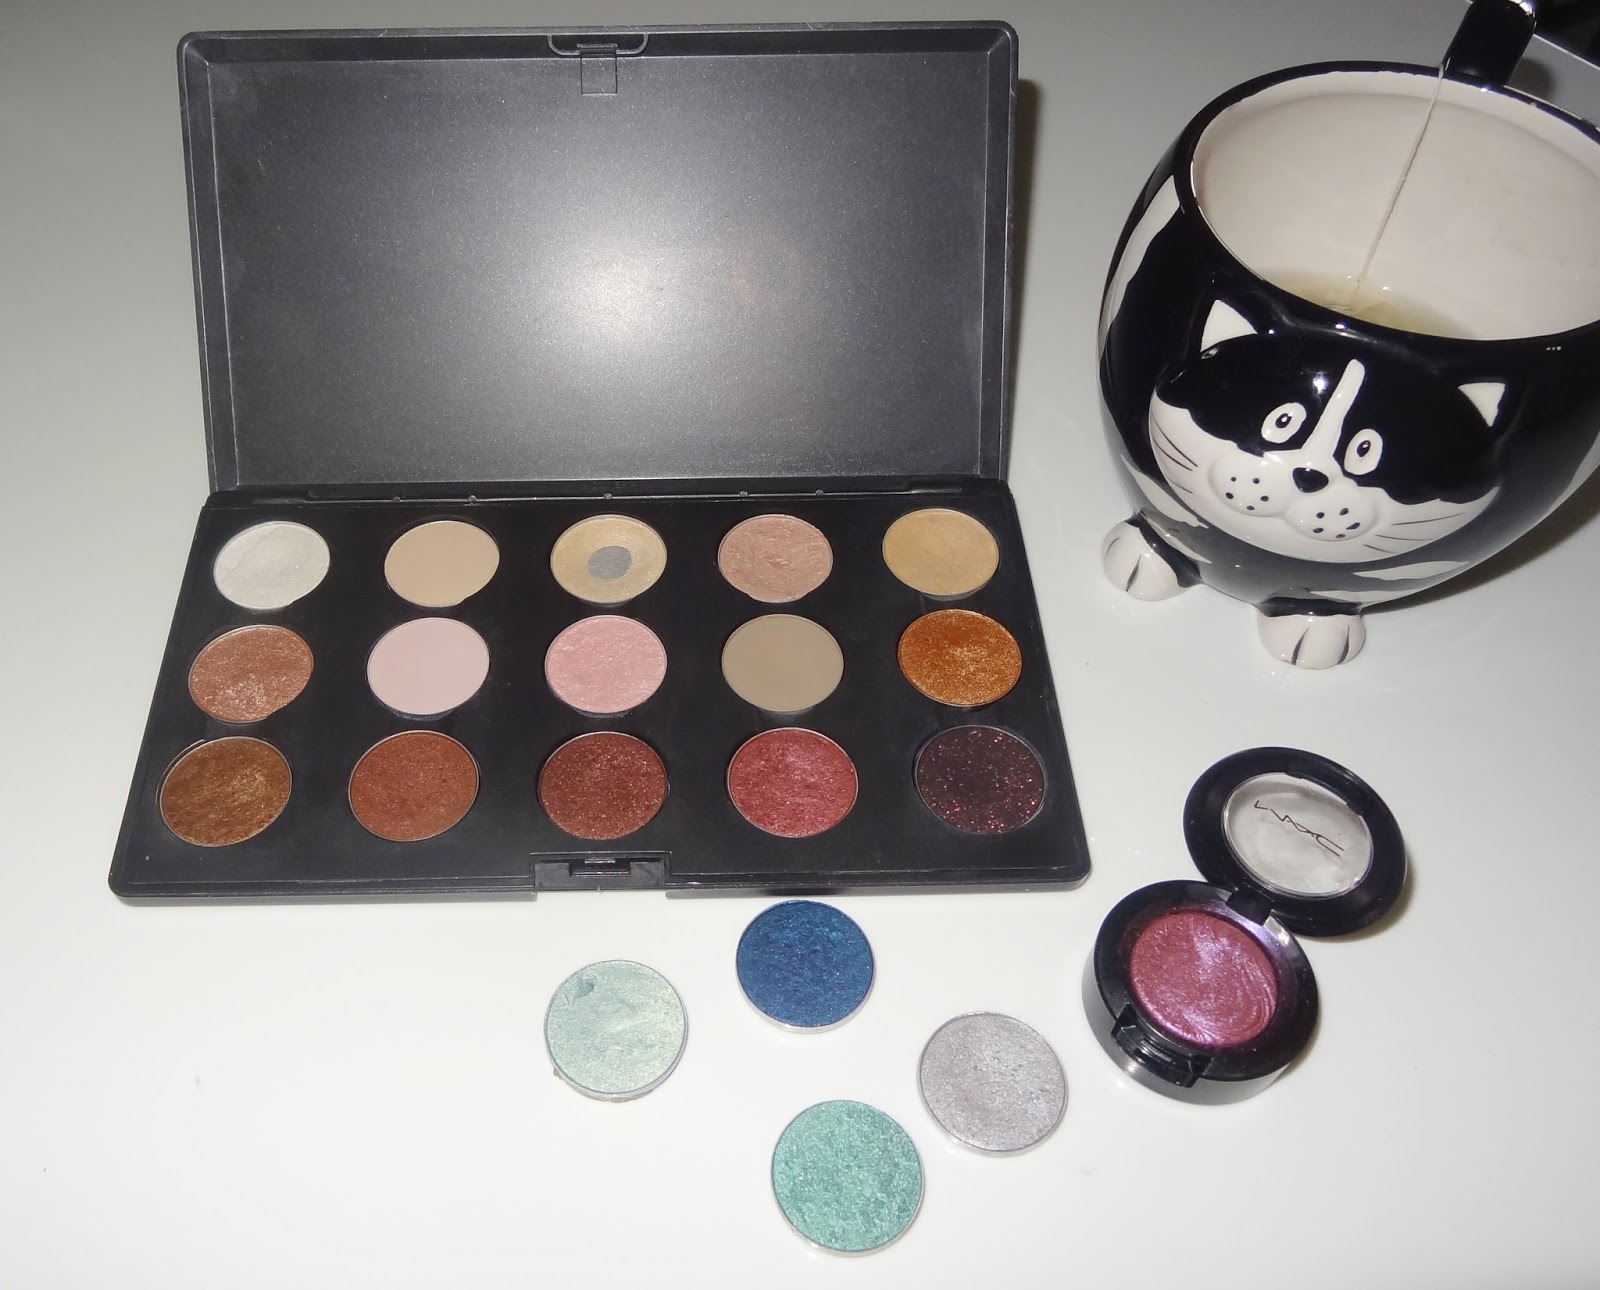
I recently bought a Z palette because my old mac palette wasn't enough for all the loose eyeshadows that I had. So I wanted to organize a little better the eyeshadows and a Z palette was the best option.
Recientemente compré una paleta Z, porqué mi paleta viejita mac ya me estaba quedando pequeña para poner todas las sombritas sueltas que tenía, así que me venía perfecta esta paleta para organizar mejor mis sombras.


Step 1:
You need to find the little groove between the shadow and the pot. Carefully, using your tweezers wiggle the pointy part of the tweezers until the shadow pops out of the container.
Primero necesitas encontrar la pequeña ranura que se encuentra entre la sombra y el contenedor. Con mucho cuidado y utilizando las pinzas, vas a introducir la puntita e intentar moverla poco a poco hasta que la sombra salga solita del contenedor.

Step 2:
You are going to light a candle and then you are going to grab the pan carefully with your tweezers and put it right on top of the flame. Move a little back and forth the pan and keep a close eye on the shadow so you don't overheat it.
Do this in a well ventilated room, so that way you don't be smelling the nasty fumes of the melted plastic.
Do this in a well ventilated room, so that way you don't be smelling the nasty fumes of the melted plastic.
Vas a encender una velita y luego vas a agarrar tu sombra con las pinzas para luego ponerlas sobre la llama. Mueve la sombra poco a poco, no la mantengas fija todo el tiempo sobre la vela para que no se queme.
Asegúrate de hacer esto en un lugar bien ventilado para que no respires los vapores del plástico derretido.
Asegúrate de hacer esto en un lugar bien ventilado para que no respires los vapores del plástico derretido.
 Step 3:
Use the pointy part of the tweezers to poke through the back of the shadow until the pan separates from the container. The metal pan will be very hot so be careful.
Utiliza la punta de las pinzas para presionar la parte de atrás de la sombra y empujarla hasta que esta salga sola del contenedor. Recuerda que la parte metálica de la sombra va a estar caliente, así que ten cuidado.

Step 4:
Peel off the sticker of your eyeshadow and place it on your depotted pan. Don't worry if there is a little glue left on the pan, the sticker will stick right into it.
Use the help of a knife to flatten the sticker, if necessary.
Saca la etiqueta de la sombra y colócala sobre el contenedor metálico. No te preocupes por el pegamento, el sticker se pegará sin ningún problema.
Utiliza la ayuda del cuchillo para fijar bien el sticker si es necesario.
Luego coloca tus sombras dentro de la paleta y listo, a disfrutar.


In every Z palette there comes a bunch of magnetic stickers. If some of the eyeshadows that you have depotted don't have a magnetic bottom, you can just easily put on a magnetic sticker on the back and stick the pan onto the palette.
You can also depot blushes, powder compacts and any kind of powdery shaped makeup product.
En cada paleta Z vienen muchos stickers magnéticos. Si alguna de las sombras que acabas de sacar de sus contenedores no tiene un contenedor magnetizado, no te preocupes, puedes ponerle un sticker magnético en la parte de atrás y pegarla en la paleta. Al ser magnético puedes moverlo y ponerlo en cualquier parte de la paleta.
También puedes poner rubores, polvos o cualquier tipo de producto de maquillaje en estas paletas. Solo es cuestión de usar la creatividad.


This is how the empty containers look like.
Remember that if you have 6 empty containers from mac, you can go to the store and change them for a free lipstick. so don't toss this babies, save them for a new lippie.
Así es como se ven los contenedores vacíos.
Recuerda que si tienes 6 contenedores vacíos de Mac, puedes ir a la tienda e intercambiarlos por un labial o una sombra gratis.

And here is a picture I wanted to share with my baby little miss Lana. Isn't she beautiful??
I love this cat so much, she is my princess.
Anyway, I hope you like this post and find it useful.
Have a wonderful day dolls.
Y aquí les comparto una foto de mi hermosa bebe Lanita. No es preciosa mi niña??
La adoro, es mi princesa. Sus ojitos me hipnotizan!!!! :)
Espero que les haya gustado el artículo de hoy y lo hayan encontrado útil.
Que tengan un hermoso día guapas.


22 comments
Te ha quedado genial.
ReplyDeletePreciosa la ultima foto!
BESOS!
Muchas gracias guapa ♥
DeleteMuy buena técnica, pero no me fío a hacerlo yo misma jajaja. Prefiero que se queden en las cajitas originales, conociéndome, armaría un estropicio. Gracias por el método preciosa!! Besos!
ReplyDeletejejejejeje Parece difícil, pero créeme que no lo es.
DeleteYo necesitaba hacerlo porque tenia muchas sombras regadas que no utilizaba y que se me perdían fácilmente. Ahora tengo mejor control de las sombras. besos guapa ♥
genial para ahorrar espacio!! :)
ReplyDeletehttp://rubiaagotas.blogspot.com.es/
Asi es cariño. ♥
DeleteGreat post! Kisses ^^
ReplyDelete·Alas de Angel·
Thank you sweetheart! ♥
DeleteAmazing post dear! You have a wonderful blog:)
ReplyDeleteWhat about following each other on Instagram, Bloglovin, Twitter?.. :)
www.bloglovin.com/blog/3880191
Todos los colores son preciosos! Nice!
ReplyDeletehttp://lafashionnalitee.blogspot.com.es/
Muchas gracias Ana, que lindo que te gustaron :)
Delete¡No tenía ni idea de que se podía hacer eso? Me has dado una gran idea.
ReplyDeleteQue bien guapa, me alegro que te haya servido :)
DeleteOh que facil se ve!! nunca lo hubiera imaginado, gracias por compartir!!
ReplyDeletexx L.
www.lalouuula.com
Gracias a ti guapa por la visita :)
Deletecool tip!!
ReplyDeletekisses from dubai ♥
www.mahryska.com
Thank you!
DeleteHola guapa!
ReplyDeleteMe encantan los colores ♥
Te sigo, me sigues?
Un besito.
Hola, muchas gracias por visitarme !!!
DeleteUn beso grande para ti. Ahora voy a visitarte.
Now I'm wondering, why did I never do this before? What a great idea!
ReplyDeleteNatalia | Lindifique
haha I am glad you like it doll! :)
DeleteGracias guapa!
ReplyDeleteI love to read new comments...
♥ Thanks for sharing what is on your mind with me!
Me encanta leer nuevos comentarios...
♥Gracias por compartirlos conmigo!